AI Integration
1. Overview
Robot 8.2 delivers integration with two AI engines:
As Robot connects to the online AI server to submit questions and receive answers an internet connection is required.
The AI is a paid 3rd party service. To enable the connection you have to create an account with the selected AI provider and purchase some credits. The cost is then derived from the amount of data transferred. The suggested initial payment of $5 is fine for a reasonable evaluation.
As of the initial 8.2 release Robot takes advantage of the AI in two areas:
-
UI tools and assistants, such as the ability to chat with the AI and analyze Robot artifacts (the screen, template images, scripts..)
-
The “AI” command communicates with the AI from a test script. This allows to involve AI in the automation, for example to analyze the screen content or recognize objects in there.
2. Set Up
To set up the AI in Robot select the AI → AI Setup menu item:
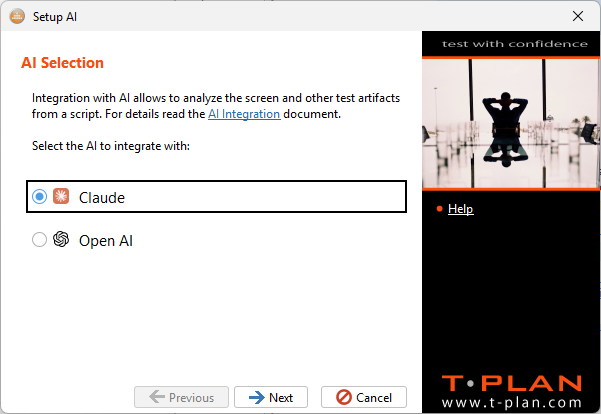
Choose the AI you wish to integrate with and select Next to continue.
It is possible to use multiple AI connections in Robot simultaneously. Simply restart the AI Setup wizard to set up another connection. The AI features will allow you to select the target AI by name to perform a task.
For the next step you will need an API key to authenticate your AI connection.
Claude AI
-
Sign in or create a developer account with the Claude AI
-
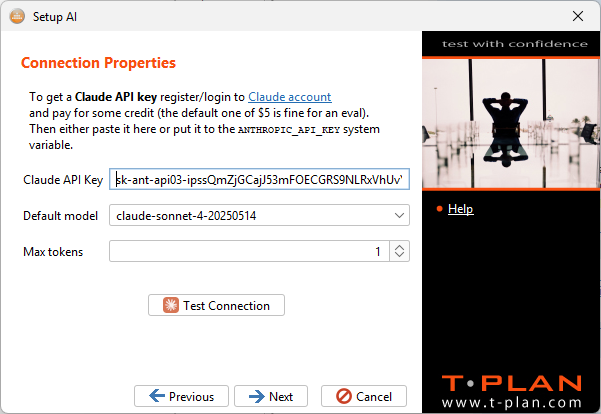
Select the “API Keys” item in the Claude AI console left column and create a key. You will be prompted to purchase some credits.
-
Paste the key to the “Claude API Key” field in the Robot’s AI Setup wizard. Robot will store the key safely in encrypted form into the user configuration file. Alternatively create a system variable called ANTHROPIC_API_KEY and save the key in there. You will have to restart Robot to pick it up.
-
The traffic between the AI and Robot is being charged by chunks of data, so called “tokens”. Read the Claude documentation for details. The “Max tokens” parameter allows you to set the maximum amount of data sent to the AI in a single request.
Open AI
-
Sign in or create a developer account with the OpenAI Platform
-
Select the “API Keys” item in the left column and create a key. You will be prompted to purchase some credits.
-
Paste the key to the “Open AI API Key” field in the Robot’s AI Setup wizard. Robot will store the key safely in encrypted form into the user configuration file. Alternatively create a system variable called OPENAI_API_KEY and save the key in there. You will have to restart Robot to pick it up.
Once done click “Test connection” to verify the connection. It sends a simple “Hello” message to the AI and retrieves the answer. Select Next to complete the configuration.
3. AI Features
As of the 8.2 release there are three features relying on the AI:
3.1 AI Chat
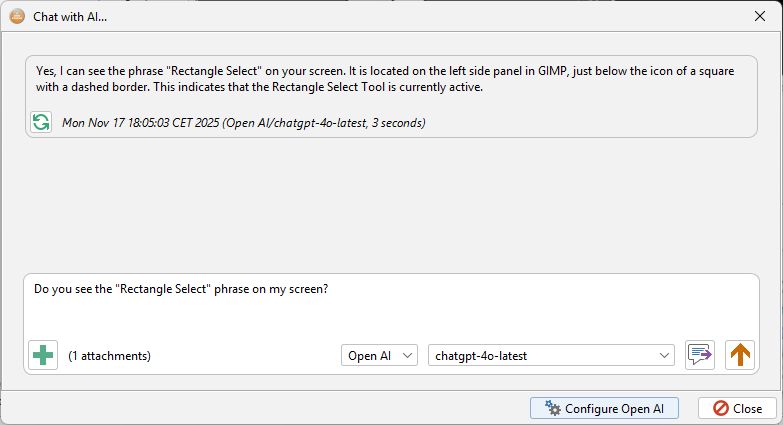
The AI → Chat with AI window allows to chat interactively with the selected AI. You may fine tune your questions to be employed by the AI command here.
TIPS:
-
Use the

-
Select recent messages with the

Many context menus available in the Project View also open the chat window and attach all the relevant images or files. For example, right click a template image node and select “Analyze with AI” to open up a chat window with the image and the screen attached.
3.2 TPR Script Code Generator
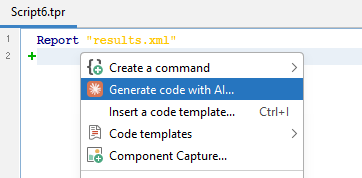
When you create a new TPR script you will be prompted whether you wish the AI to create the code for you. To add new AI generated code to an already existing script right click an empty line in the code editor and select the “Generate code with AI…” menu item.
TIPS:
Claude’s Sonnet model seems to deliver better results than Open AI.
For best results use the AI to create smaller code blocks. Provide a precise and accurate description of what to automate. Try to provide a description of what a user would do on the device. Examples:
-
Open Calculator and press 5+5=
-
Open Notepad and type “Hello world!”
Select the generated code in the script editor and execute it using the ![]()
3.3 AI Command
The AI command allows to ask the AI on the fly from a running automation. The options are endless, you may ask whether your screen contains a certain object or text, you may attach a text file and ask the AI to look up certain information etc. See the AI command specification for details and examples.
Make sure to phrase your question properly to make the response verifiable. For example, ask “Does my screen contain an OK button? Please respond “Yes” or “No” only”. Then test if the response is Yes or No. Use the chat window to verify that the AI responds in a way you expect!